Crispy Spring Rolls

Raghu Yadav
| 10-07-2026
 · Food Team
Lykkers, have we ever wanted to create a restaurant-style snack in our own kitchen? Today, we are preparing Thai-style fried spring rolls, a popular crispy treat known for its golden wrapper and flavorful filling.
These spring rolls, often enjoyed as a snack or starter, combine soft noodles, fresh vegetables, and seasoned filling wrapped inside a thin pastry sheet. After frying, each roll becomes beautifully crisp on the outside while keeping a rich and tasty center.
The best part is that we can prepare this dish step by step at home. By following the right order, choosing fresh ingredients, and paying attention to small details, we can create delicious spring rolls that are perfect for sharing with family and friends.
Ingredients We Need
This recipe makes about 15 to 20 Thai-style spring rolls.
For the filling:
- 50 grams glass noodles
- 200 grams minced chicken
- 1 tablespoon vegetable oil
- 3 garlic cloves, finely chopped
- 1/4 teaspoon ground white pepper
- 1 cup shredded cabbage (about 80 grams)
- 1/2 cup shredded carrot (about 50 grams)
- 1/4 cup dried wood ear mushrooms (about 10 grams, optional)
- 1.5 tablespoons oyster sauce
- 1 tablespoon light soy sauce
- 1 teaspoon sugar
For wrapping:
- 20 spring roll wrappers
- 2 tablespoons all-purpose flour
- 3 to 4 tablespoons water
For frying:
- About 500 to 700 milliliters vegetable oil, depending on the size of the pan
For serving:
- Sweet chili dipping sauce, according to personal preference

Step One: Prepare the Filling Ingredients
Before cooking, we prepare all ingredients carefully. This makes the cooking process easier and helps us create evenly flavored spring rolls.
1. First, place 50 grams of glass noodles in a bowl. Add enough room-temperature water to cover them completely. Soak for about 10 minutes until the noodles become soft and flexible.
2. After soaking, drain the water and cut the noodles into shorter pieces, about 5 to 7 centimeters long. Shorter noodles are easier to mix and prevent the filling from becoming difficult to wrap.
3. If we choose to use dried wood ear mushrooms, place 10 grams of mushrooms in warm water for 15 to 20 minutes. Once softened, rinse them well, remove any hard parts, and slice them into thin pieces.
4. Next, prepare the vegetables. Wash the cabbage and carrot, then cut them into thin strips. Finely chop the garlic cloves and place all prepared ingredients aside.
Step Two: Cook the Flavorful Filling
1. Heat 1 tablespoon of vegetable oil in a large frying pan over medium heat.
2. Add the chopped garlic and ground white pepper. Stir gently for about 30 seconds until the garlic releases its aroma.
3. Add 200 grams of minced chicken to the pan. Use a spatula to separate the pieces while cooking. Continue stirring until the chicken is fully cooked.
4. Next, add the shredded cabbage, shredded carrot, and sliced wood ear mushrooms if using. Cook everything together for 2 to 3 minutes until the vegetables become slightly soft but still keep some texture.
5. Add the prepared glass noodles, 1.5 tablespoons oyster sauce, 1 tablespoon light soy sauce, and 1 teaspoon sugar. Stir well and continue cooking for another 2 to 3 minutes.
6. The filling should become flavorful and fairly dry. Too much moisture can make the wrappers soft and difficult to seal.
7. Once finished, transfer the filling to a large plate. Spread it out and allow it to cool completely before wrapping.
Step Three: Prepare the Wrapping Paste
1. While waiting for the filling to cool, we prepare the sealing mixture.
2. Mix 2 tablespoons of all-purpose flour with 3 to 4 tablespoons of water in a small bowl. Stir until it becomes a smooth paste.
3. This simple mixture helps seal the spring roll wrappers tightly and prevents them from opening during frying.
Step Four: Wrap the Spring Rolls Carefully
1. Place one spring roll wrapper on a clean surface. Turn it so it looks like a diamond shape, with one corner pointing toward us.
2. Place about 2 tablespoons of cooled filling near the lower part of the wrapper.
3. Fold the bottom corner upward over the filling. Gently press it down to keep the filling in place.
4. Fold the left and right corners toward the center. Then slowly roll the wrapper upward until reaching the top corner.
5. Brush a small amount of flour paste onto the final corner and press gently to seal.
6. Place the finished spring roll on a plate with the sealed side facing downward.
7. Repeat the same process until all filling and wrappers are used.
Step Five: Fry Until Golden and Crispy
1. Pour vegetable oil into a deep frying pan. The oil should be around 5 to 7 centimeters deep so the spring rolls can cook evenly.
2. Heat the oil to about 175°C to 180°C.
3. If we do not have a thermometer, we can place a wooden chopstick into the oil. Small bubbles appearing around the chopstick show that the oil is ready.
4. Carefully place several spring rolls into the hot oil. Avoid adding too many at once because overcrowding can lower the oil temperature.
5. Fry each batch for about 4 to 6 minutes. Turn the rolls occasionally so all sides become evenly golden and crisp.
6. When finished, remove them with a slotted spoon and place them on a rack to allow extra oil to drain. This step helps keep the texture crunchy.
Step Six: Serve and Enjoy
1. Our homemade Thai-style spring rolls are ready to enjoy while warm.
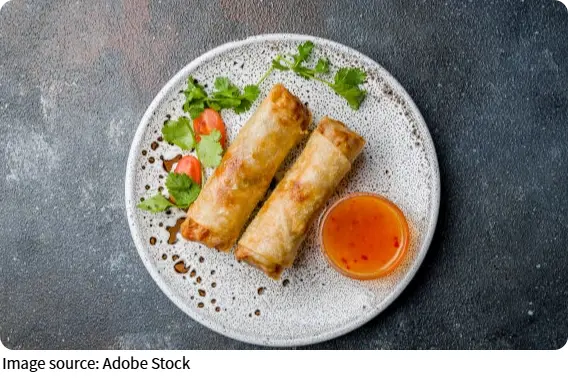
2. Arrange them on a serving plate and pair them with sweet chili dipping sauce. The crispy wrapper, savory filling, and refreshing vegetables create a wonderful combination of textures and flavors.
3. These spring rolls are great for sharing during family meals, gatherings, or relaxing weekends at home.
Let’s Cook Together
Lykkers, making crispy Thai spring rolls is not only about preparing a tasty snack. It is also about enjoying the cooking process and creating happy moments in our kitchen.
Have we tried making spring rolls before? Would we like to add different vegetables or create our own filling combination? Share our ideas and cooking experiences with others, and let’s continue discovering more delicious homemade recipes together.
How to Make Thai Fried Spring Rolls
Video by Vallada